Saturday, December 4, 2010

Constructing Miniature Rooms - What's the Best Way?

What's the best materials to use to build room boxes or dollhouses? I've built two dollhouses from scratch - one with 3/8" birch plywood and one with Gatorfoam. (The photo at left is of a house built with Gatorfoam.) I was happy with both projects. But dollhouses are generally box construction projects. Unless they have turrets or bays, the building is pretty much 90 degree angles - simple to do.

Room boxes, on the other hand, are often more complicated. The design of a room box is like a stage set design. Few of the angles are actually right degrees. This allows the artist to create a variety of angles in the room and a sense of depth in a small space. It also makes construction of them more complex.

There are drawbacks to using both Gatorfoam and plywood. Both comes in large sheets. Cutting large, flat sections of wood or Gatorfoam, on a small hobbyist's table saw can be a challenge. At best, you'll waste more of the expensive building materials than you would like. At worst, you'll not get the walls cut precisely at the angles you need or want, leaving gaps and walls standing at awkward angles. Some of these gaps can be hidden with crown molding or with matte board glued to the ceiling of the room. Baseboards and flooring also help hide any gaps along the floor seams.

I've made several roomboxes now, and for two of them, I utilized old-fashioned, stick-frame building with matte board glued to the surface. The stick-frame uses pieces of wood assembled much like a real building is built. The problem with the stick built frame is that it's a bit flimsy until it's all glued up with the matte board attached. It's too easy to glue it up so and end up with walls not being perfectly square with the ceiling or floor.

The barbershop project our miniature club is working on is a perfect example. I cut out the pieces for everyone. The pieces were all the same size and shapes, planed to within microns of being the same in shape and angles. Yet, the four people assembling them ended up with slight variations in the finished product, and the angles of the corners are all slightly different one from another. Go figure!

The advantage of the stick frame build is it's lightweight, and you can easily run wiring through the walls or along the walls. The disadvantages are the irregularities you can get with assembly.

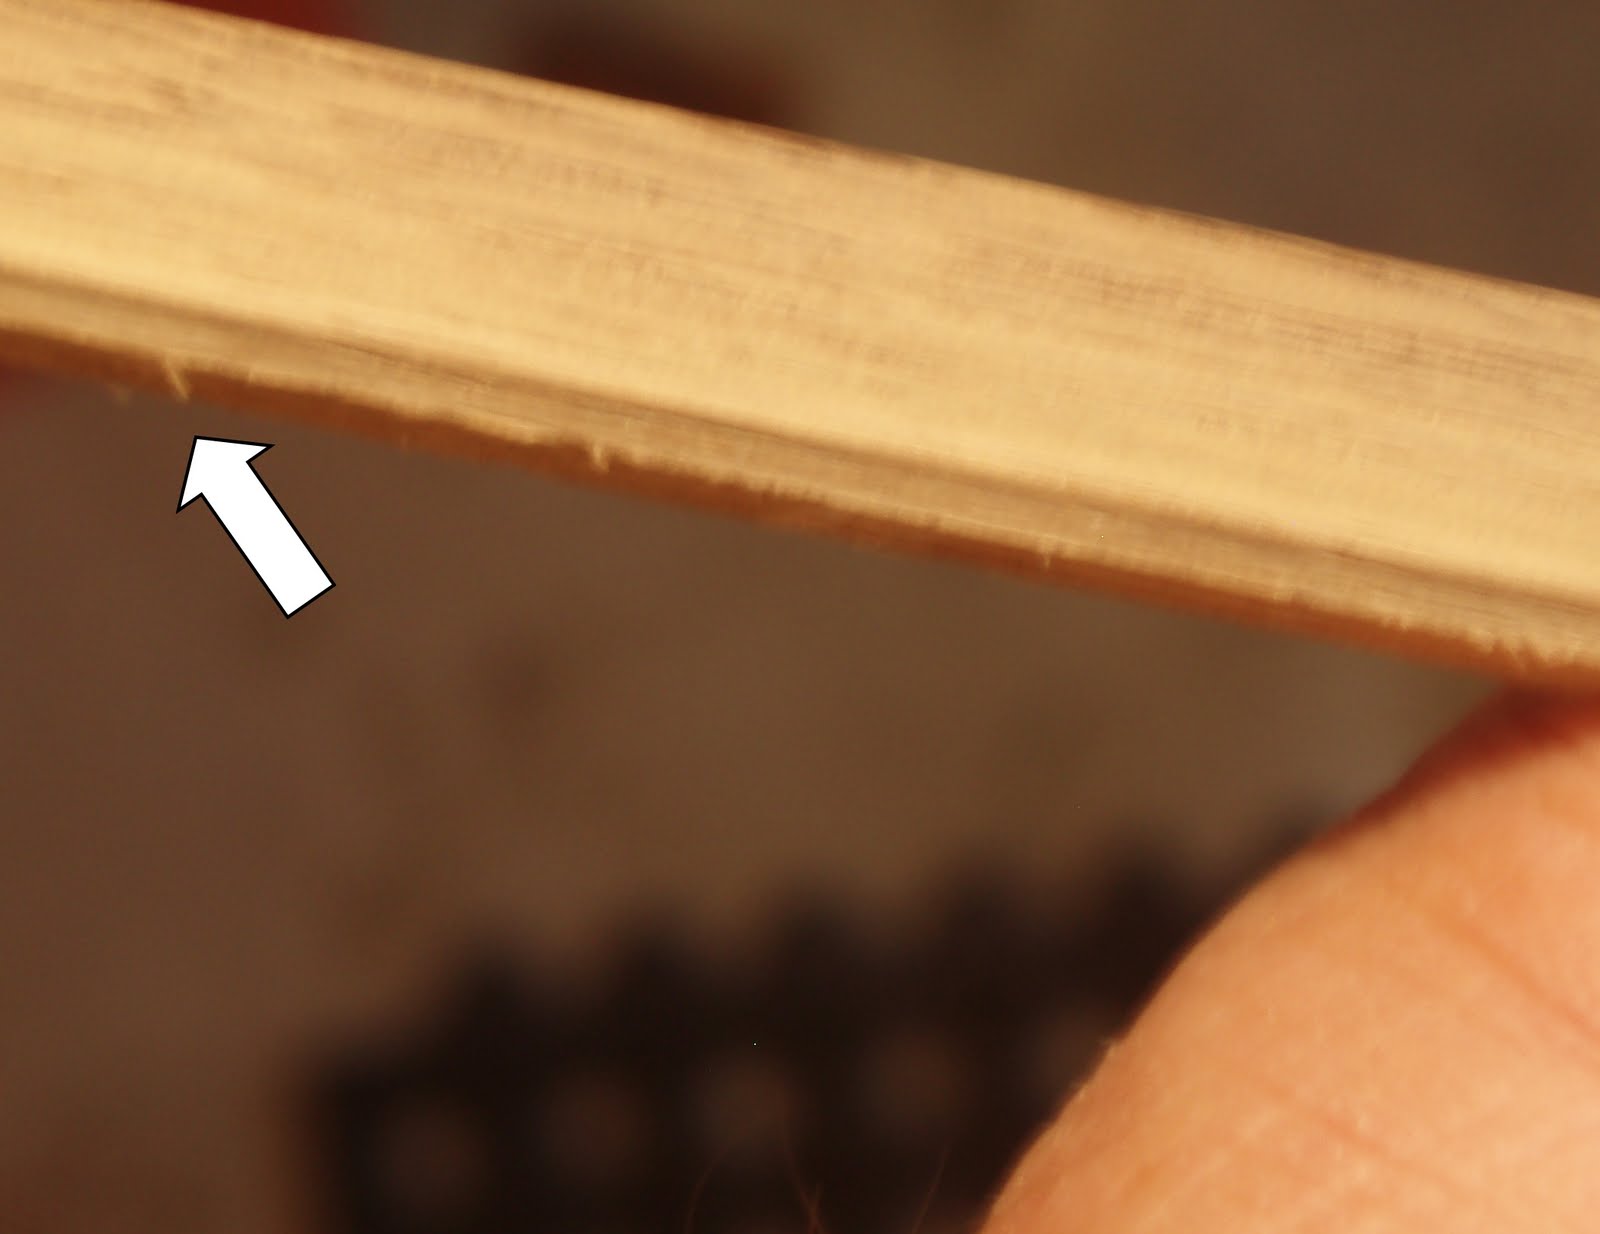
I have also done some construction with the paper-backed foamcore material. This material usually comes in quarter inch thickness. I have found two problems with it. One is that it tends to warp pretty easily. Add wall-paper to it, and as the paper and glue dry, the foam can become distorted.

I also find it a bit flimsy. It just doesn't seem like a product that will hold up for an extended number of years. If you don't intend on keeping your miniature creation for an extended period of time, then maybe it would be okay for your project. I plan to burden my kids and maybe even my grandchildren with my creations. ;o) So, when I build my pieces, I want them to be durable.

The most stable, light-weight and easy to work with material is the Gatorfoam. An added bonus to it is it's white. So, if you want white ceilings for your room, there's little or no painting that you need to do! The downside of the material is it's expensive, and not widely available. If you're okay with mail ordering, though, then you're probably good to go!

I started building Pam's dollhouse over 30 years ago, and the house is still as structurally sound as it was when I put it together. The ceilings are still white. The foam core has not shrunk. I know this, because no gaps have emerged.

You can't use screws or nails to put Gatorfoam together. I discovered, though, that a little glue and wooden pegs I made from dowels worked quite well. I used a pencil sharpener on the dowel pieces and then I used my X-acto knife to cut gill-like edges along the sides of the pegs. The sharp pencil-like tips made it easy to push the peg into the Gatorfoam, and the gill-like edges helped keep the pegs from pulling back out.

Even though I've built three dollhouses now, I still want to build a computerized, animated, haunted house. When I do, I will most likely use Gatorfoam to build it. And I think if I do another room box, I'll use Gatorfoam for that project, too!

Monday, November 15, 2010

Faux Marble Painting

     One of nature's more astounding creations is metamorphic rock. Specifically, I'm thinking of the crystalline form of limestone that is hardened from heat and pressure into marble. Marble comes in so many different colors and it's crystal consistency varies so much - anything from swirls of color to dense points of color. And in almost every case, it's beautiful! It's also one of the more fun things a miniaturist can create for a dollhouse or roombox.

      On the left is the faux marble fireplace I made a few years ago. In today's blog, I'm going to share the techniques for how to paint faux marble.

Step One: Sand your wood until it is smooth. Then paint the wood with a white paint such as gesso, Kilz or Zinsser Bin primer sealer. (I prefer Bin, since it is alcohol based and doesn't raise the grain of the wood like water-based paints can.) Sand the white paint until it is smooth. If any wood shows through, add a second coat of paint and sand it smooth.

Step Two: Decide on the color you want your marble to be. Green? Teal? White or cream? Or some other coloration? I use mostly Ceramcoat hobby paints. It's not that those are my favorite paints, it's just that the hobby store near me carries a wide assortment of colors in that brand.

The teal-colored marble at left was created using the following palette of colors:
  • Med. Victorian Teal
  • Cape Cod  (blue)
  • Metalic Gunmetal Gray (Folk Art brand)
  • Blue Velvet
  • Dark Burnt Umber
 The beige and rose sample at left contains these colors:
  • Fleshtone
  • Georgia Clay
  • Burnt Umber
  • Sandstone
  • Heritage Brick (Americana Brand)
  • Blacksmith Black (Folk Art Antiquing)

 This green marble was made with these colors:
  • Dark Forest Green
  • Blue Velvet
  • Mudstone
  • Burnt Umber


And this one was made with these colors:
  • Old Parchment
  • Dark Burnt Umber
  • Lt Ivory
  • Burnt Orange (Americana brand)
If I would have had  another light brown or taupe color in my drawer, I think I would have added that to this one. (I'm not thoroughly satisfied how this one turned out.

So... now that you know the color schemes, here's what else you'll need:
  • a very tiny paint brush
  • a broad, chisel point paint brush (between 1/2 and 1 inch wide)
  • natural sponge
  • a cup of water
  • facial tissues, paper towel or toilet paper
  • a stiff paint brush
Below, you can see my first step with the green marble. I put some of my green paint onto some wax paper, then I dipped my half-inch brush into the water and then dabbed it into the green paint. I then
 unloaded some of the paint onto a piece of newspaper so that the brush was slightly less loaded with the paint. I then swished the brush across the boar. (Sorry for the slightly out of focus shot here.) As you can see, it was fairly intense in color. In fact, too intense for my first layer of paint. So, I immediately dabbed at it with a tissue, and thus the color became less opaque.

The photo below and to the right shows  how the color looked after I dabbed at it with the tissue. I continued to make dry brush marks onto the wood. I probably should have been more cautious to make sure that my strokes weren't all
vertical. As you can see here, there was a strong directionality to my strokes. The beauty of real marble is its randomness. So, make sure to be random with your paint strokes!

You can see in the photo at right that there's a second color beginning to appear. That was the dark blue color mixed with a hint of the green.

Next, I squeezed some of the  mudstone colored paint onto the newsprint and spread it out so that it wasn't a thick blob. Then I took a small piece of natural sponge and dabbed it into the mudstone paint. Then I gently blotted the grey paint over the green. I did the same with some of the green paint, and I did a small amount of this with some of the blue (watered down).

Notice how I left some of the white
peeking through the colors. If at all possible, you want to make sure that you don't totally cover over all of the white. This adds to the luminescence of your marble slab and makes it look more real.

The next step is to take a dark color such as black or dark umber and create tiny blobs of the darkness on your piece. You can do this with a the stiff paint brush. Get a little paint on the brush and then tap it on a sheet of paper until most of the paint is gone, then tap it onto your painting surface. If you get a large blog anywhere, immediately dab at it with a tissue. If that doesn't soften the color enough, moisten a tissue or a piece of paper towel and dab at the spot with the moistened tissue. Another way to get tiny dots is to take an old paint brush, dab it into the dark paint, and then flick your finger across the bristles so that the bristles flick dots of paint everywhere. (Make sure you're not doing this on your most prized antique dining room table!) It's messy, but it you don't get too much paint on the toothbrush, you can get a very nice, random effect this way.

If you want to tone down the piece, you can add a light wash of one of your dominant colors. Again, try not to paint the entire surface - swish the watered down paint across portions of your marble. Then dab at it with your tissue to keep the tone more subtle.

Finally, you need to create the fissures in the rock. That's where you use a very fine brush and use the black, burnt umber or other dark color and add the most delicate lines you can muster with this brush. These lines need to be random. Some connect. Some go a little ways and then take a sharp angle in another direction. This adds another interesting dimension to the painting.

And there you have it! Let the paint dry. Then cover it over with a couple coats of clear sealer to give the paint a deeper luster. With a modest amount of practice, you'll be able to paint a piece of marble that you can be proud of! Have fun with it, and don't be afraid to play with multiple colors!

Saturday, September 25, 2010

Making Solid Furniture Pieces

    There are two basic lines of thought with miniature furniture making. One line of thought is to make the piece virtually the same way as a full-sized piece is made. If the full-sized piece has working drawers, then the miniature has them, too. If the real one has padded cloth seats, then the replica does, too.

    The other line of thought is, "If the people who view the piece will not be able to pick up or touch the item, does it really need to be such an exacting replica?" I have created a variety of miniatures and have used both philosophies.


    Right now, I'm building the shoeshine stand and chair for my barbershop. The picture at left is my working drawing that I did in PowerPoint. In real life, it would be a heavy piece; probably constructed out of oak. It reminds me a lot of the minister's chair that was in the church where I grew up.

    I plan to sit my barber doll in this chair, reading a newspaper or a hunting magazine. The main thing is that the seat and back of the chair will mostly be obscured by my little barber. So, do I need to put real padding and leather on the chair? I don't think so. I currently plan to make the black leather parts out of wood. I'll seal it; then paint it. I may even grind in some indentation into the "leather" so that my barber sits more comfortably (that way he won't tip over too easily). I most likely will glue him to the seat anyway!
    I also plan to make the drawer in the bottom fake. It won't be open and doesn't need to open; so, I will glue a piece of wood to the base to represent the drawer front. I'll add some knobs to this (small 
brads), and call it good. I did this with the dresser in the maid's room in Sara's dollhouse. It turned out okay. (You can see it in the background on the right side of the picture.)
     The nice thing about making a solid miniature piece is how quickly it goes together. Also, because it is not nearly as delicate, it holds up for a good long while.
    It's a good argument for making any furniture a child might play with in a dollhouse. Skip the fancy working drawers and delicate furniture. Make something the kids can accidentally step on without smashing it! And if they do break it, (a) you, the builder, aren't devastated that all your beautiful work has been wasted and (b) you can make a replacement piece in a heartbeat!
    I'll share the finished piece with you when it's done.

Saturday, September 11, 2010

How to Make Routed Moldings Using the Dremel Tool

Sorry about my absence, friends. It’s been an incredibly busy summer and start of school. Plus, I’ve had a bout of writer’s block! The full-scale projects for my daughters are coming along nicely, though. The deck is nearing completion at my one daughter's house as is the bathroom/walk-in closet at the other daughter's home. So, now I can begin to think small again...

Today I'm going to discuss how to use the Dremel router table. I use my Dremel tool and various router bits to make an endless array of moldings for my miniatures, including baseboards. One of the frustrations that I have encountered when running long, thin pieces of wood across the router is that sometimes I press down too hard or too lightly as the wood goes over and past the router blade. As a result, I can get cupping or little dips or waves in what should be one continuous indentation the length of the wood strip.

Through trial and error, I have developed the following approach to help reduce this problem. Here are the steps I take to get better routing performance:

Step 1: Take a piece of wood that is at least 1/8" thicker than the piece of wood you plan to route. It doesn't need to be particularly wide. As you can see by my example, it can be a little over an inch wide and about four to six inches in length. I prefer to cut this piece of wood at a slight angle, as shown in the picture at left. This will become your "hold-down" piece that will help you keep a more even pressure on the routed board as it goes past the router bit.


Step 2: After you have cut your hold-down piece, lower your blade until it is at the same height or slightly lower than the thickness of the piece of wood that you will be routing (see picture at right). If you click on the photo to enlarge it, you'll notice that the blade is as much as 1/32" lower than the top edge of the wood strip that I will route. For this step, always make sure the blade does not extend above the piece of stripwood.


Step 3: Take your hold-down board and make a number of passes across your table saw blade so that you slowly nibble away the wood. You can see in the example at left, as the saw blade cuts through the bottom portion of the hold-down piece, it creates a shoulder on the hold-down board. Continue to cut your hold-down piece until the stripwood almost is the depth of the cuts. When you put the hold-down board on top of the stripwood, you should be able to see about 1/64" of the stripwood still protruding above the hold-down. (See picture below for example.)
Step 4: Install the router bit in your Dremel tool and adjust the height to the approximate height you want to route. (Tip: I always cut extra pieces of wood so that I can run some test cuts past the Dremel bit to make sure I have set the bit at the right height and that the adjustable guide fence is in the right position.)  I often set the blade and the fence ever so slightly less than what I ultimately will rout the wood. If I'm removing a lot of wood from the stripwood, I will cut perhaps half of the amount of wood that I plan to remove with the first pass across the router.

I do the rough cuts, running the wood past the bit a couple of times, then I sand the wood to remove burrs that pop up. See example photo below of wood with burrs on it. NOTE: If you attempt to rout too much of the wood at one time, the burrs can become large splinters, and no amount of sanding will correct for the gouge made in the wood from that large splintered spot. Take your time - make multiple passes, cutting a little at a time, and you'll be much happier with the final product!
Step 5: Take the hold-down piece of wood and set it over the piece of stripwood. Then push the stripwood against the adjustable fence and press down on top of the hold-down wood. The picture below shows how I start a piece of wood. Once the stripwood begins to engage the router bit cutting blades, I slide the hold-down to where it is centered over the cutting blade. Try to maintain consistent amount of pressure on the hold-down wood throughout the entire pass of the stripwood. When I get toward the end of the piece of wood, I often take a piece of scrap that is the same size as my stripwood and push the stripwood on through the router and past the hold-down area so that I cut the entire length of stripwood.
Step 6: Once you have run the stripwood past the router bit, adjust to the final height and depth, gently sand the stripwood with a fine sandpaper, and then do your final pass on the router. When making this final pass, you should cut only a minute amount of wood. This final pass should actually help sharpen the edges and lines of your routed wood. Also, because it is removing so little wood, there is less likelihood of your getting burrs on the edge of the wood.
As you can see above, here is an example of wood routed with a ball-shaped cutter. The piece of stripwood was not perfectly flat between the 4 3/4" and 5" mark. As a result, the cut is slightly (and I mean slightly!) less deep than the rest of the piece of wood. To help prevent this from happening, always make sure you start with a piece of wood that has a consistent width and depth to it. Sand it or run it through your table saw as needed to make sure you have a good piece of stripwood to work with. Remember, whatever your router bit shape is, the shape you cut into the wood will be the opposite. A ball-shaped cutter produces a rounded indentation in the wood (as illustrated above). A cup-shaped cutter will round off the edge of your wood.

Happy routing!

Saturday, August 14, 2010

Filling Blemishes or Flaws in Your Wood

Sorry for not posting for so long. Every weekend since July 4, I have been out of town working on my daughters' home improvement projects! The deck is coming along - no more broken windows so far! And I actually fixed a crooked door frame unit on my other daughter's remodeling project; so I feel pretty happy with that accomplishment.

I just learned a new trick from Woodworker's Journal that may help you if you're working on a painted wood project where there is a wood knot or a flaw in your wood. (When you put paint over those types of blemishes, they almost always show through.) Here's the trick for filling and hiding that flaw:
  1. Sprinkle baking soda on to the flawed area. Then take a putty knife and smooth the baking soda across the flawed area. You'll see the low points fill with the white baking soda.
  2. Push the excess baking soda aside, leaving the white residue on your wood.
  3. Next, take some cyanoacrylate (CA) glue, and drip it onto the areas that show up as white on your piece of wood. It will darken the wood, but since you're going to paint over it, don't worry about that. Let the glue cure and harden.
  4. Take some fine sandpaper and smooth the area to your satisfaction. Wipe off the sanding residue. You're now ready to paint, and the blemish from the wood knot won't show through!
I'm sure you probably figured this out already, but if you intend to do a natural wood look, with stain and varnish, this is NOT a viable solution!

Monday, July 19, 2010

Free Online Design Software

Tonight, I began to experiment with some new, three-dimensional software from Google called Sketch-Up. It's available FREE from Google. Working with this software is reminiscent of the first time I started to do something in PowerPoint.

I felt lost and a bit overwhelmed, but excited at the same time. It's just amazing what you can draw using this software - if you know what you're doing. You can "put a hole" through a solid object in no time at all. Create a square, click on the pull out icon, and suddenly you have a pillar or a box - whichever you need!

I hope to become proficient at using it, because it allows the user to see every angle, every side of a project - even the bottom of the object! What an interesting tool for drawing up dollhouse plans or for designing mini furniture! I hope I will someday say I feel as competent in using it as I do with using PowerPoint! That only comes with practice and experience, though. So, back to the (online) drawing board!  See ya later!

Friday, July 9, 2010

The Deck - Part Deux (Or Is it Doh!?)

I was hoping you all would get a laugh out of my goofy demolition story. The saga of the deck just continues. Here is part two of "the project."

So, my daughter and I went to City hall and applied for the building permit. The chief inspector was there. He shook our hands. Took a very long look at each of us, and repeated our names a couple of times - as if preparing himself to be able to recognize our obituaries in the newspaper after we dug the postholes. He almost had a look on his face of "You poor fools. You have no idea what's in store for you!" But he kept his comment to himself.

Once I picked up the auger, I realized that in spite of her can do/never say die attitude, there was no way my tiny little daughter and I were going to be able to handle that auger. So, I prepped the holes - dug all six of them about 18 inches to 2 feet deep. All my son-in-law and I had to do was to plop the auger in the hole and dig down another 18 to 24 inches. Piece of cake! Right?!?

...or not. We got the auger started and it dug like crazy. It pulled itself into the earth like there was no tomorrow. Then we tried to lift it out. Uh, I said LIFT. Um, no go. I said, LIFT!!! Nothing happened. The auger had dug itself into the earth, and it seemed like there was little or no chance of our freeing it from its self-dug grave. But the devilish thing cost me $90 to rent, and I knew I had to get it back to the rental store. So, my son-in-law got out a tiny plastic trowel, and we took turns reaching into the hole and digging out what seemed like tiny spoonfuls of dirt. We eventually got down to the auger blade, and once we did, it was somewhat easier to pull it out of the hole. When we got it fully extracted, with its extension still on it, I realized that the handlebars were nearly up to my armpits.

By this point, both my son-in-law and I were tired, but we rested up and got ready to take a stab at digging posthole #2. Then the digger wouldn't start. We pulled. We adjusted the choke. We pulled and pulled again. Nada! Zip. Not even a burp out of the stupid machine. By this point, my arms were already aching and my son-in-laws back was, too. We agreed we'll try a smaller machine and dig down from there to the official 42" frost level. So, tomorrow is another day. Maybe we'll get this deck built. Miniatures are looking better and better every moment as we go further into the holes!!!
:o)
Geo.

Why I Like Working in Miniature So Much

Fair warning... this is not your usual blog from me...

I am reminded today WHY I like working in miniature so much. I'm about to build a deck with my daughter at her house.

Yesterday, I tore down the old back porch from her house. The wood was quite weathered, and many of the screws were hard to remove. I finally took my power saw and started cutting. What I couldn't tear apart with the saw, a sledge hammer managed the rest. I was down to the last upright post, which was hanging on by a few strands of wood. So, I took my sledge hammer and gave it a whack! That did it! The 8 foot tall 4x4 careened over to its side -- right into my daughter's 3' x7' plate glass window! They tell me it will cost a little over $400 to fix it....

Next, I called the rental supply to line up a power post-hole digger (an auger). The guy at the rental place said, "It works best with these power augers for the two people running it to be the same size." (I'm 6'4". My daughter is 5'2".) "Otherwise," he said, "the shorter person really takes the brunt of the lifting and running of the digger." My daughter is all of about 110 lbs. I'm a string-bean, too. The auger weighs 80 lbs. This could be a very interesting day.

So, here's my list of why I like building miniatures as opposed to full-size stuff...as if I really need to tell you, dear readers!
  • No building permits required. 
  • No heavy lifting (unless you have to move a dollhouse...)
  • No power drills to maintain and charge.
  • No blisters.
  • No heavy-duty sweating. 
  • No mud on your shoes after building a mini deck.
  • No sunburn or mosquito bites (unless you really want to work on your mini on your patio or deck). 
  • The framing boards on a dollhouse deck weigh less than an ounce for each 12' length.
  • No back-ache (unless I bend over my minis at my workbench for extended hours at a time).
  • I would also include "no building inspectors", but I have to admit that if I build a mini, I usually want to show it off to others, and every time I do that, there are the critics and critical eyed people who give me their two cents worth about what is right or not right with my project!

Tuesday, June 29, 2010

More Details on Making Your Cabriole Legs

The old saying is that a picture is worth a thousand words. So, in still pictures, here are the steps for creating the cabriole leg. I promise, this is the last that I'll write on this, unless someone presses me for more details!
Step one: Cut your wood to a length that is slightly longer than the cabriole leg. (See photo at lef.) As you can see, there is a little white space above and below the table leg  drawing.

Step two: Cut the leg blanks. I placed the piece of wood on its side against the saw blade and then pushed the fence up against the block of wood. This way, I know I'll be cutting a block of wood that is as wide as it is deep. The length, of course, will be as long as the table leg blank.


You can see from this angle how I cut the blanks for the leg pieces. The cabriole leg I designed here is less that 3/4" wide. So I am able to cut all four table legs from a single piece of 1 x 4 wood.


Step 3: Cut out the paper drawing of the cabriole leg. Fold the paper along the dotted line (see previous blog for photos of the cabriole leg drawings). Use any kind of craft glue or double-stick tape to apply the drawing to the sides of the table leg blank.


 In this photograph you can see that I glued the paper tightly to the blank. I did not leave any gaps between the fold and the wood. (If there are any gaps, the cutting process will not be accurate.)


Step 4: Begin cutting the leg. In this illustration, you can see how I use a lighted, artist's magnifying glass with my table jigsaw. This makes it much easier for me to look at the piece and see exactly where I'm cutting.

I began to saw the cabriole leg by cutting through the bottom of the blank, and continued up along one side of the leg. I make sure to stay on the outside edge of the black line.


When I got to the top of the leg, I continued to cut a little above the leg, then made a gentle curve over to the other side of the leg, and then cut down along the back side of the cabriole leg. I continued to cut all the way along that side until I cut through the bottom edge of the blank.

As you can see, when I finished this cut, the "leg" is loose within the blank. It could actually fall out, and it could wiggle as I cut the other side.


Step 5: Put clear tape around the blank piece to prevent the leg from moving. This will help you to make a more accurate cut as turn the leg a quarter turn and make the same series of cuts on side two of the blank.


As you get to the end of the cut, be sure to hold down the piece of wood so that the wood doesn't rattle as you make the final cutting strokes on the piece. (Note my finger at the top of the table leg in the photo at left - the saw blade is at the bottom of this picture.)

Step 6: If you have a table saw, I recommend cutting the bottom and top of the leg using this saw so that you get a precise, right-angle cut. If you don't have a table saw, take a try square, mark all the way across the piece of wood and slice the bottom and top edges  of your table leg. 
Step 7: Remove the waste from your table leg. You will have nine pieces of wood. Only one - the one in middle - is useable. The rest become scrapwood, unfortunately.

At this point, you will have a roughly cut table leg. You'll need to sand it and perhaps carve it. I usually round the edge of the outside curved portion of the leg. I also use my Dremel tool to round the underside (back) of the leg. I try to leave the sides of the leg fairly "sharp." I will sand them to remove the raw cut marks, but generally, I prefer not to round their edges as much as the front and back. Find some examples of real cabriole legs and study them to see how the woodworker finished those pieces. That will give you a better sense of how to finish the cabriole legs.

I hope this has been helpful for you. Have fun with your cutting! 

Monday, June 21, 2010

Written Instructions for Making a Cabriole Leg

I did not realize how much my international readers might rely on the Google translation capability to read this blog. Nor did I realize the disadvantage they might experience when I posted my video about how to make cabriole legs. So, today's blog will be written instructions for how to create cabriole legs for your miniatures.
 You can cut cabriole legs with a table bench jigsaw, a band saw or a hand coping saw. I would not try to cut them using a hand-held power jigsaw, because the pieces of wood you will work with are so small, it would be very difficult to control the cutting process.  The table jigsaw can handle up to about an inch thick piece of wood (at the most). A band saw might handle a slightly thicker piece of wood; however, the overall width and depth of cabriole legs rarely exceeds one inch in a miniature.

I have made cabriole legs out of pine, bass, cherry and walnut wood. I have not tried other exotic woods. I would not recommend using especially hard woods - they might look great when finished, but cutting exceptionally hard woods may take its toll on your saw blade or your patience!

The first step in the process is to draw the shape of your cabriole leg or find one on the Internet or in a book featuring furniture with cabriole legs. For your convenience, I've posted a picture with this blog showing a table leg (2.7" tall - or about 32" tall) and a chair leg (1.3" or about 16" tall) that you can use.

The next step is to  print out a paper copy of the  leg design. Your paper copy must have both the left and right view of the leg in a perfectly vertical position. (My pictures above provides this.) Try to make sure that you leave a little white space - approximately 1/8" or more between the widest point of both legs (which the illustration above also has). Draw a vertical line between the two legs. You will fold your paper copy along this vertical line. (The above picture has a line centered between the two halves of the cabriole legs.)

Cut your pieces of wood so that they are the same width and depth. Next, make sure the length (height) of this piece of wood is about 1/2" longer than the cabriole leg. The wood grain should be in the long direction of the piece of wood.

Use double-stick tape to secure the paper copy of the leg to your wood. I buy this kind of tape at my local business office supply store. You can sometimes get it in large rolls that are about 3/4" wide or in smaller rolls that are about 1/2" wide.  Either width works just fine.

Put the tape on the back side of the paper. For the ease of fastening the paper to your piece of wood, don't put any tape along the edge where you have folded the paper. Make sure your tape extends slightly beyond the leg image on all sides. Once you've added the tape to the paper, then carefully fasten the picture to your piece of wood. The fold should touch one angle of the wood blank all the way down so that there is no gap anywhere between the paper and the wood.

You are now ready to cut the first side of the leg. Start at the top or the bottom of the long portion of wood to begin your cut. Be consistent in how you cut the piece - make your blade cut precisely through the lines or precisely on the outside edge of the line. Try not to go back and forth between cutting on the line or outside of the line - cutting that way will result in a disappointing cabriole leg. Cut all the way past the the bottom of the leg by about 1/8 to 1/4", then curve around  and cut the other side of the leg. Cut all the way back up to the top of the piece of wood and out the end near where you started your cut. You will now have two pieces of wood. Feel free to take the piece out and look at it, then insert it back where you took it out. Take some clear tape and wrap it around the pieces to hold the loose piece of wood in place within the block of wood.

Now turn the piece of wood to the side that has not been cut and repeat this process. When finished making the second cut, tape the piece back together once more. Now that you have the blank cut out, you can cut the top and bottom of the leg. If you have a table saw, I would recommend using that saw to cut a precise, right angle across the top and the bottom of the cabriole leg. That way, you'll be certain that you have a precise, 90 degree cut on the leg. If you don't have a table saw, then I'd recommend cutting the leg with a hobbyist's miter saw. If you prefer to make the cut with your table saw, take a try square, mark a line across the top and the bottom of the leg, and cut very carefully so that you end up with a squared off top and bottom.

You are then ready to peel away the tape you have placed around the pieces of the leg. You will have nine different pieces of varying shapes. Only one - the one in the center of the pieces - will be the cabriole leg. All the other pieces, though interesting, are scrap.

Sand the extended edge of the cabriole leg to round it and shape it to your preferences. Repeat the process until you have the number of cabriole legs you need for your piece of furniture. Good luck! Send me pictures if you have a completed piece. I'd love to see what you make!

Saturday, June 12, 2010

The Vending Machine Is Finished

You saw the interim steps for the Coca-Cola vending machine, and here is the finished item. I used computer-printed decals to create the grill on the side of the machine and for producing the signage on the sides and top of the machine. The hardest parts of this project were to get a smooth finish on the paint and to get a good match between the red of the decal and the vending machine. I couldn't print the white "ice cold" text onto a clear decal; so I had to print on a decal material with a base color of white and print the red ink on top of it. The silver bottle opener was part of a decorative, silver bead that I cut in half and ground the back away so that it would lie at an angle when glued to the side of the cooler.

Monday, May 31, 2010

The Pack Rat in Me Wins - Again!

For those of you who have seen my blog post showing my tiny workshop, it's cluttered with all sorts of pieces of wood that I have not tossed. Even though they're not very big, and some people might think they're useless, I keep thinking, "That's a good piece of [insert kind of wood here]. I could probably use that sometime..." It's the pack rat in me that drives me to keep it!

For those of you reading this blog who don't live in North America, the pack rat is a real live rodent that is notorious for collecting "stuff." They especially like shiny objects. People who never throw "stuff" away are also called pack rats.

Well, today, I couldn't find my calipers (still can't) and so I cleaned up my workshop. I had a small box filled with little pieces of wood - 1" x 1" x 3/4" - very small pieces. I finally decided today, "OK, I'm not going to need those blocks of wood anymore. Time to pitch those!" A half hour later, I was out in my garage digging them back out of the trash can. (Fortunately, I hadn't tossed anything else into the can this week!)

Those tiny blocks of wood are perfect for holding my pieces of wood up off the table so that the painted edges don't stick to the workbench. I put a couple of pieces of double-stick tape on the blocks and set my wood on top of it. Voila!  The perfect tool for painting. So, now I have to figure out where to store these little pieces of wood... I'll give a couple of them to each of the mini club members so they can do the same thing when they paint their Coke vending machines!

Sunday, May 30, 2010

How to Paint Your Miniature

Actually, I need to provide a disclaimer here...this may not be the best "how to" you've ever read!

At left is the start of a mid-20th Century Coca-Cola vending machine model I'm making for the barbershop. I had carefully cut out my wood and glued it together to the precise measurements, sanded it to make the nice rounded corners, and sprayed it with several coats of BIN primer. I used wet-dry 600 sandpaper, dampened it, and smoothed each layer of the primer. After the second coat, I began to sand it with two levels of grit - the 600 to remove any big junk and then 1500 wet/dry to smooth it even further. (I dipped the paper into a bowl of water and sanded in a circular motion, taking care NOT to scrub too hard along the edges.)  And my model was beginning to look pretty good!

I realized that when I started to hand paint the red latex paint , I needed some way to hold the miniature, since I needed to paint ALL of the sides, and if I held it any places where I'd already painted, I be leaving huge fingerprints in my paint. So, I drilled a small hole in the bottom, and inserted a long screw into it, which serves as a "handle" for me to use so that I can paint. The handle worked great for drying, too. I took a pair of vice grips and snapped them down on the screw, and had a very sturdy way of holding the vending machine right where I needed it. So far, so good!

Then I started adding layers of the red, latex paint that I had specially mixed for me at the hardware store. I got four coats on the piece, and things were looking pretty good. Maybe I hurried it too much, and didn't wait long enough for the paint to dry. Maybe I pressed too hard with my sandpaper. Maybe I needed to change the water to remove any impurities from previous coats I'd sanded.  I'm not sure what caused the sanding to go wrong. At any rate, as I was carefully sanding with my 1500 wet/dry sandpaper, large chunks of the red paint peeled away all the way back down to the primer coat! YIKES! (Actually, I said something a little stronger than that...) So, tomorrow, I will start over - maybe with a different kind of paint...

If you want to know what it's supposed to look like when it's done, here's a link to a picture of it on the Web: http://www.4americanrecreation.com/images/ice-coke-machine.jpg. I will show you a picture of the vending machine once it's done.

Wednesday, May 19, 2010

Stained Glass for the Barbershop Door

Here's my front door for the barbershop. I know it's not perfect - my lines are a little wavy - especially with the bottom part of the glass. I got in a hurry and didn't push the leading material just a little southward on the right-hand side. I may end up having to redo that part.

That's the fun part about using this stained glass material on glass. You can scrape it off and do it again. Or, you can create various stained glass windows using a template and do the "glass" on a piece of special plastic. If you like what you've created, you can trim it to size and insert it into your window.

I tried doing it the old-fashioned way - placing my leading on the glass and then adding the color stains. The advantage of doing it that way is that I know my colors will truly bleed to the edges of the window frame. Had I done it on the plastic sheet and THEN cut it out for the window, there's the chance that a tiny sliver of light would show around the edge, and that would not be realistic looking, either.

For those of you who are curious about what I used and where I got the stained glass "stuff", I purchased it at the Michaels store here in town. I'm sure you can purchase it online, too. I bought a kit, since I knew I didn't need a lot of the staining gel. It's interesting stuff to use. The "leading" is available either in a tube or in sheets that you can cut. I chose the sheets, since I was certain that I could not pour out a line that was about 1/32" wide. One of the leading sheets comes pre-marked at 1/16" widths. For miniatures, though, that would be far too wide! Even 1/32" is a bit bulky, but that's about the best I could do with trimming this stuff on my first go-round. When you add the colors, they look quite opaque. It's deceptive, because you think, "Oh dear! This won't look good!" Then it dries into much brighter, slightly translucent, jewel tones. Now I'm wondering why I never did more of this with my dollhouses! It was a lot of fun and easy to do.

If you're wondering, the I left the center of the window as plain glass. They make an etched glass material that I could have used, but I want the "Open" sign to be hanging in the glass from the back side. It's a little more realistic to have that be clear glass for the barbershop, too, I think.

And if you're wondering what the brand is, it's Gallery Glass by Plaid. ;o)

Tuesday, May 18, 2010

Some Things You Should NOT Buy in Advance

I finally had a project I wanted to do that would use my glass staining kit. I purchased it a while ago. Um, maybe it was more than a while... In fact,  I think I bought the kit about 20 years ago... ulp!

It was really cool, though, with nice little bottles in a variety of colors and "liquid" lead that I could add to a needle-pointed dispenser and create stained glass windows. When I dug these items out of a drawer over the weekend, , the cute little bottles of stained glass colors were almost completely dried up. I had discovered the "lead" tube had dried up several years ago and had tossed it previously. Sigh. I know it's the cheapskate in me, but I just HATE to waste money on tools and/or products that I never use!

So, take a lesson from my experience - if it's a chemical, wait until you NEED it. Then buy it! ...even if that stain, paint or other chemical product looks really cool at the time you're in the store, you can probably buy it later on-line. I bought the stained glass kit when we went crazy at a miniature store years ago, and in retrospect, it obviously was not money well spent.

I also discovered that the manufacturer of the glass stains is no longer in business. Fortunately, though, another company has stepped into that void, and there IS a product for making stained glass windows. I'll share my finished window with you in my next post. I'm tickled with how it is turning out! It's going to look great in the front door of the barbershop!

Tuesday, May 4, 2010

Kitchen Table - Another Quick Furniture Project

Here's another quick furniture project for you to try. This would make a good, sturdy kitchen table for a child's play dollhouse. It would also be in scale for a more refined miniature collector's dollhouse - especially if you were to add some toll painting or paint it and age it a little.

The only tricky part is cutting out the seven degree angle on the spacers. One way to do this is to take a scrap piece of plywood and draw a line horizontally across the piece of plywood. (Use a piece of scrap about 4" long by about 3" wide.) Try to center it about 1.5" in from the edges.

Next, draw a seven degree line at least 1.5" long - with 1" protruding above the horizontal line and the other half protruding below the line. Draw this intersecting line close to the right edge of the plywood if you are a right-handed person. Draw the line to close to the left-hand side if you are a lefty. Now, glue a small board along the edge of the horizontal line just up to where the seven degree mark intersects with the line. You have created a sort of miter guide for yourself. If you've left enough wood on the bottom edge of this "guide", you can clamp it to your workbench or tabletop so that you have greater control as you hold the pieces in place and saw them.

You can now cut your spacers to a 2" x 1/2" dimension. (Use 1/8" thick wood for the spacers, please.) Set the first spacer down so that the bottom touches where the two lines intersect. Use a razor or modeling saw. (X-acto makes pretty good ones). Line up the razor saw blade with the intersecting line and carefully cut the angle into the first spacer. Turn the spacer over sideways (not top to bottom) and repeat this cut so that you end up with a trapezoid like you see in the picture above. Repeat these steps to make the next three spacers.

The table legs are relatively easy to cut - especially if you have a small table saw. If not, you may be able to get some pre-cut wood at your local hobby store that is 1/4" x 1/4" dimensions. If so, then you only need to cut the leg pieces to 2.5" lengths. The table top is 3/32" wood, and should be a simple circle 4" in diameter.

Place a piece of wax paper on your desk or table top and glue one spacer to two of the legs. Repeat this procedure with one more spacer and the other two legs. Allow the spacer and the table legs to sit flat against the wax paper. If you have some clamps, you may use them to gently pull the pieces together for maximum adhesion. Allow these two sets of legs to dry overnight so that they are good and solid.

Day two, put one of the assembled leg pieces on its head so that the spacer is touching the wax paper and the legs protrude up. Add glue to one end of the remaining two angled spacers. Place them in position just like the already glued spacers are arranged. You will want the spacers to the inside of the square you are forming with the table legs protruding slightly from each corner.

If you wish, you can build a small gluing jig for yourself to help hold the pieces in alignment. Start with a piece of wood 2" square glued to a piece of heavy cardboard or plywood. Then glue some of the left-over quarter-inch wood pieces so that they form a square 1/4" wider all the way around this 2" square. The inside dimensions of this second "square" will be 2.5". To provide support for the table legs, you can take some cardboard and fold it into a box that is 3" square by 2.5" tall. If glued correctly, the table legs should just touch the corners at the top of this little "box."

Allow the table legs and spacers to dry for a day or two. Once it's good and solid, take the assembly and carefully place it face down on a piece of 100 grit sandpaper. Use a circular motion to remove the corners of the table legs that will be protruding above the spacers. Check frequently to make sure you're not sanding one side more than the others. A good trick here is to hold the piece, and make four or five circular sweeps on the sandpaper, then turn the piece 1/4 turn, and sand again. Repeat this process, making sure you do the same number of sanding strokes on each side and using the same amount of pressure when you sand.

Once you've flattened the tops of the table legs, you can then glue the table top to the legs and spacers. Draw a faint X on the bottom side of the table with a pencil, making four equal quadrants of the table top. Se the table top face down and then glue the leg assembly to the top. Make sure each table leg touches one of the lines you have drawn. When all of the leg corners are touching one of the lines, you know your table top is perfectly centered on the table legs.

After the table has dried, you can sand the legs the same way you did them at the top, gently working them across the sandpaper to flatten them. Be very gentle with your sanding at this point - one leg too short can cause a tippy table! You can now finish your table with stain and varnish, paint it to match your kitchen decor, or antique it however you wish!

Hope this works for you. Let me know if you encounter any problems!

Sunday, May 2, 2010

Does It Look "Real?"

Take one dollhouse, a couple photos of a city park area, some photo editing software, and voila! You have a somewhat convincing picture of a Victorian house on a lovely estate.

In a slide show where this image will be on the screen for about two to three seconds at the most, I'm hopeful that the viewers won't notice the various edits I made in putting this together.

For instance, the flowering crab trees are a copy and paste of the same tree, flipped and enhanced a little. (The front one on the right is doubled up, in fact.) I cloned the windows on the right-hand side of the house. They were narrowed versions of the windows in the bay window that I copied and pasted. If the overall photo doesn't come across as convincing, well, I at least had fun playing with the software and learning how to use it!

For those of you who are curious about what software I used, it was Microsoft Digital Image Suite 2006. It was considerably less expensive than some of the fancy professional editing software packages that I've seen. I occasionally use it to clean up the color in some of my dollhouse photos that I use in this blog.

Friday, April 30, 2010

Which Is More Important: Looking Real? Or Being Fun?

I'm working on a slide show at the moment that is intended to capture the "realness" of miniatures. The photo at left is one of the pictures for that show.

Just this week, I was delighted to see that my daughter has framed and hung her collection of photos that she made of some of our dollhouse rooms. She has dedicated a wall outside of one of the bedrooms to this collection.

She shot this series of photos for a class she was taking at the time at the local community college. Her classmates were curious about how she had been given access to an old Victorian house. Once she admitted that the photos were of scale rooms, several said that something seemed just a bit odd about the rooms, but they couldn't put their finger on why they seemed "different."

I love the challenge of doing my utmost best to make scale miniatures. When something small looks absolutely real, there's something very charming about it. I feel like Gulliver in the land of Lilliputian's.

There is a faction of miniaturists, though, who would turn up their noses at anything that isn't absolutely perfect. For the collectors of fine miniatures, I can understand their thinking. Our hobby has a bigger base, though, than just the high-end collectors. Much of its origins was as playthings for smaller hands and bodies, and children played with these things for the sheer job of it.  I hope we never forget that our hobby should be first and foremost all about having fun.

Even though it's probably my least favorite dollhouse of the three that I have made, the one at right is the one that truly got lots of play from my daughter. Even though she's a grown woman, she occasionally will stop and make some decorating changes, or she rearranges a few things to suit her tastes at the moment.

There's a fourth dollhouse that I made and never show on this blog. It was very small - only two rooms to it. I made it for a TV commercial that I did years ago. The girls played with it and to a great degree destroyed most of the fancy stuff I had done on it. Again, it was a well-loved piece that the girls thoroughly enjoyed playing with. After I finished the one above and it began to get all of the loving attention from my daughter, I got rid of the little, beat-up house.  It had grown dusty out in the garage and it was covered with cobwebs. It was a disposable toy house. I hope the ones I'm building now will not end up in a trash heap - at least not for an extended number of years after I'm gone.

So, to answer my own question at the beginning of this blog - what's most important to me? My answer is simple: Enjoying this hobby and sharing it with others! And if what I make looks real, all the better!

Sunday, April 18, 2010

Easy to Build Furniture

It's been too long since I posted anything on my blog. I've been up to my eyeballs with work, and haven't had any time to write! So sorry. I'm still crazed with work, but I just HAD to put something out on my blog. I value your readership - all 150 of you!

I got to thinking that some of you might appreciate some ideas for some simple furniture pieces that shouldn't be too hard to produce. At the left is just such a project. 

I encourage you to click on the image and take a screen print of the drawing. Paste it into a Word document and then print it out. You may have to adjust the size of the picture. I marked the width of the back of the chair; so you should have an idea of how much to blow up or reduce the chair on your own computer. I made this storage chair for our Christmas gift exchange in our miniature club many years ago. It has no fancy joinery, and the only tricky thing is to make sure you drill so that you can insert pins into the chair seat.

Here are the instructions:
1. Cut out all of the parts from 3/32/" thick cherry or bass wood. Sand the pieces smooth.
2. Trial fit the parts to make sure they fit properly.
3. Glue the back to the base piece.
4. Glue the sides onto the base and back. (If you intend to stain the piece, be careful to wipe away any excess glue right away with a damp cloth.)
5. Glue the spacers onto INSIDE of the sides. Make sure there's at least a quarter inch of clearance between the back of the spacers and the back of the chair.
6. Trial fit the front onto the chair. Sand any excess wood at the base or sides that protrude from the bottom or from the sides. Then glue it into place.
7. Use some sandpaper or emery board to round the front and back top edge of the seat.
8. Set the seat into place. Put a business card between the chair seat and the chair back so that there's a small gap. Now drill a pin-sized hole on each side of the chair where it's marked with an X in the diagram. (If you don't trust the diagram, you can set the seat in, then take a try square and line it up with the protruding seat to have a sense of where to place the pin. 
9. Once you have drilled your hole into the chair sides and the seat, snip about 1/4" of the sharp end of a straight pin and gently push it into the hold you have drilled. If the pin is too long, you can pull it out slightly, snip a little off and push it in again. You want the pin to be flush with the surface of the chair sides.
10. Stain and varnish the chair or you may have fun tole painting it!

Hope this works well for you. If not, you know where to reach me! Enjoy!

Thursday, March 25, 2010

Tools for Making Holes

As a miniaturist, you will often have a need to put a hole into something - a board, a wall, furniture, or a piece of matte board - there are thousands of reasons for needing to add holes. There are many ways of getting those holes punched, too. I have a leather punch and a paper punch, but I rarely use them for my miniature making. The ones you see above, plus one low tech and one high speed tool, are the hole-makers of my hobby.

Sometimes, the simplest tool for making a tiny hole is a push pin or a T-pin. You can usually puncture a piece of matte board or make a starter hole for where you want to drill with either of these "tools." They're also less painful to work with than plain straight pins, which can make your fingers sore if you press hard on their ends.

Of course, having a cordless electric drill is almost mandatory for any home owner. It's also a valuable tool for miniaturists who want to build dollhouses or room boxes. I use screws to assemble my room boxes. I think the screws hold the wood together better than nails, and there's less likelihood of my nailing crookedly and breaking part of the wood out from the side of the box. You can use even delicate, 1/16" drill bits in a cordless drill. Once you begin to get much smaller than that, it's time to move on to the pin vises. The tinier the drill bit gets, the easier it is to break. The sheer weight of the cordless drill and the leverage that it can easily apply to a bit is just too much for a tiny, 1/32" drill!

I show four pin vises in the above picture. The two on the left are swivel top drills. The two on the right are "fixed" tops. The prettiest one is probably the one with the wooden handle. It's also the least handy for me. Here's why. The swivel top allows you to apply downward pressure on your drill bit by pressing on the top of the drill. Since the drill swivels, you can hold it in place on the swivel and turn the drill with your other hand. Or, you can hold the swivel portion of the drill by your pinky finger and still turn the drill with your index finger and thumb. You have considerably more control over the work when you do this. The fixed top drills are, well, awkward. I suppose one can argue that the wooden handled drill above gives greater leverage than the other smaller drills, but the key to using a drill is to let the drill bit do the work for you - not your hand pressure!

By the way, the plastic egg-looking item in the top, right-hand corner of the big picture is a set of miniature drill bits that I purchased years ago. I've broken or lost at least half of them. When you get down to micro-sized drill bits, they are delicate. If you get them a little ways into the wood and then carelessly allow the drill to move at a slight angle instead of straight on at the hole you're drilling, well, you probably will have added a snapped off piece of drill-bit to your project!

I really like the longer swivel-top pin vise above (and at left), because it comes with four different collets built into the shaft. For those of you who have not used a pin vise, the collet is a piece of metal with a hole in the center and slits on the sides. It expands slightly to allow you to push a drill bit down into the hole. Once you screw the top of the drill back over the collet, this tightens the collet snugly around the drill bit. Dremel tools and pin vises both use collets. You can see the extra collet in the back half of the drill at left. The collet you see has two different hole diameters to accommodate different bit sizes. I can turn remove this collet and replace it in the drill end of the pin vise to hold the drills.

The "low tech" tool I referred to at the beginning of this article is pretty rudimentary, but it works well for cutting holes! It's the X-acto or hobby knife! You can press the sharp point against a piece of wood or matte board and with a few turns of the blade, you have cut a conically shaped hole into the piece. And sometimes that is exactly what you need or want!
The one rule to remember with the Xacto knife is that it is extremely efficient at cutting. It can make a hole in you as fast or faster than it does in the wood or paper! Dropped from a workbench onto your foot, you can impale yourself. Always make sure you set it down on a flat surface away from the edge of the table and beyond where you might bump it with your hands while working on a project. Better yet, when you're done using it. Put it back in your tool box!

I can't finish this blog posting without noting the high speed tool that I use regularly in my miniature making. My Dremel tool is a constant companion at my workbench. It drills, it grinds, and it shapes. Wow! What a great tool!

So, there you have it - a variety of tools that can accomplish one simple task - making holes in your miniature things!

Sunday, March 21, 2010

Making Your Own Baseboards

The walls in my barbershop room box were just too tall, leaving the edge of the wallpaper exposed at the bottom. I had to decide on adding some wainscoting or to make my baseboard a little taller than the commercially manufactured baseboard that I have. So, decided to make my own baseboard. I also made some of my own baseboards for Sara's dollhouse using this same method. I'm going to show (and describe) what I did to make this baseboard molding.

Let's start with the finished product (below). Please note the picture is missing one final detail that will be part of the baseboard - quarter round wood at the bottom of the baseboard. I will glue that in place when the room box is fully assembled and I'm ready to glue the wall permanently into the box. The baseboard I made is approximately one inch tall - taller than the baseboard you would normally buy at a miniature store. It's made from 3/32" basswood.

Safety reminder: If you want to do anything like this, please always remember to wear safety glasses or goggles to protect your eyes!


Here's what I did to make it:
  1. I cut the 3/32" basswood into the 1" wide strips. Then I sanded the edge I ripped with my table saw.
  2. Next, I set up my Dremel tool in the router base (see photo at right). You may also notice the plastic protector at the very top of my router. When I'm routing pieces like this, I flip this out of my way.
  3. See the photo below for the round-over router bit I used. The bit barely peeks out from the edge of the fence so that it cuts a curve into the top of my board. I also allow the bottom edge of the blade to protrude about 1/32 to 3/64" above the router table. This can add another tiny line at the top of the rounded over piece of wood. The photo below is an extreme close-up showing you the Dremel bit I use for this process.
  4. Once the fence and cutting bit are both set for the correct depth of cut, I'm then ready to begin to route the wood.
  5. I usually find a piece of scrap wood at this point that is several inches long and not quite as tall as the piece of wood I'm cutting. I use the scrap wood to hold my piece of basswood against the fence of the router, and I use either my finger or another piece of scrap wood to hold the basswood down so that it touches (and remains firmly touching) the route table surface. (See photo below, which is an overhead view of how I hold the pieces of wood against the router table fence.) Once I have this "jig" in place, I begin feeding the basswood strip through the router. I don't hurry it. If the sound of the router begins to change significantly, I know I'm pushing too fast, and I slow it down.
  6. Sometimes I will start with the fence set a little closer to the router bit so that the first pass through the Dremel router is a "rough" cut. I then move the fence back a tiny amount, exposing a hair more of the bit and run all of my pieces through the router again for the finish cut. Whether I move the fence or not, I always run my "boards" through the router a second time to smooth the cut and clean up any rough spots that might still be on the board.
  7. For some reason, I often get an uneven cut on the first or last half inch of this piece I'm routing. So, if you're following this tutorial to make your own molding or baseboard, always be prepared for some wastage. I usually route at least one if not two extra pieces just to make sure I have plenty of stock to work with. (Nothing is more frustrating than coming up inches short and then having to start all over to recreate another piece of the same stock!)
  8. Moldings and trim boards are all about lines and shadows. I created a line in my baseboard just below the curved portion of the board by cutting a 1/32" depth table saw cut. I used my thinnest saw blade that I currently have for my table saw to cut this line. This blind cut adds to the overall shape and personality of the baseboard piece. It has no other serious value or purpose. However, if you wish, you can always flip your baseboard over and reverse the wood 180 degrees to put a groove into the back of your baseboard for a wiring run. Some commercially manufactured baseboards have a gap cut specifically to hide the tiny electrical wires. See photo below for the approximate set-up of the table saw.
  9. I always sand the cut that I put into the side of the baseboard to slightly round the edges of the cut. (An emery board held at an angle and sanded very gently on both of the sharp edges of the cut works well for this.) 
  10. Next, stain or paint your baseboard, and you're ready for installation!
Related Posts with Thumbnails